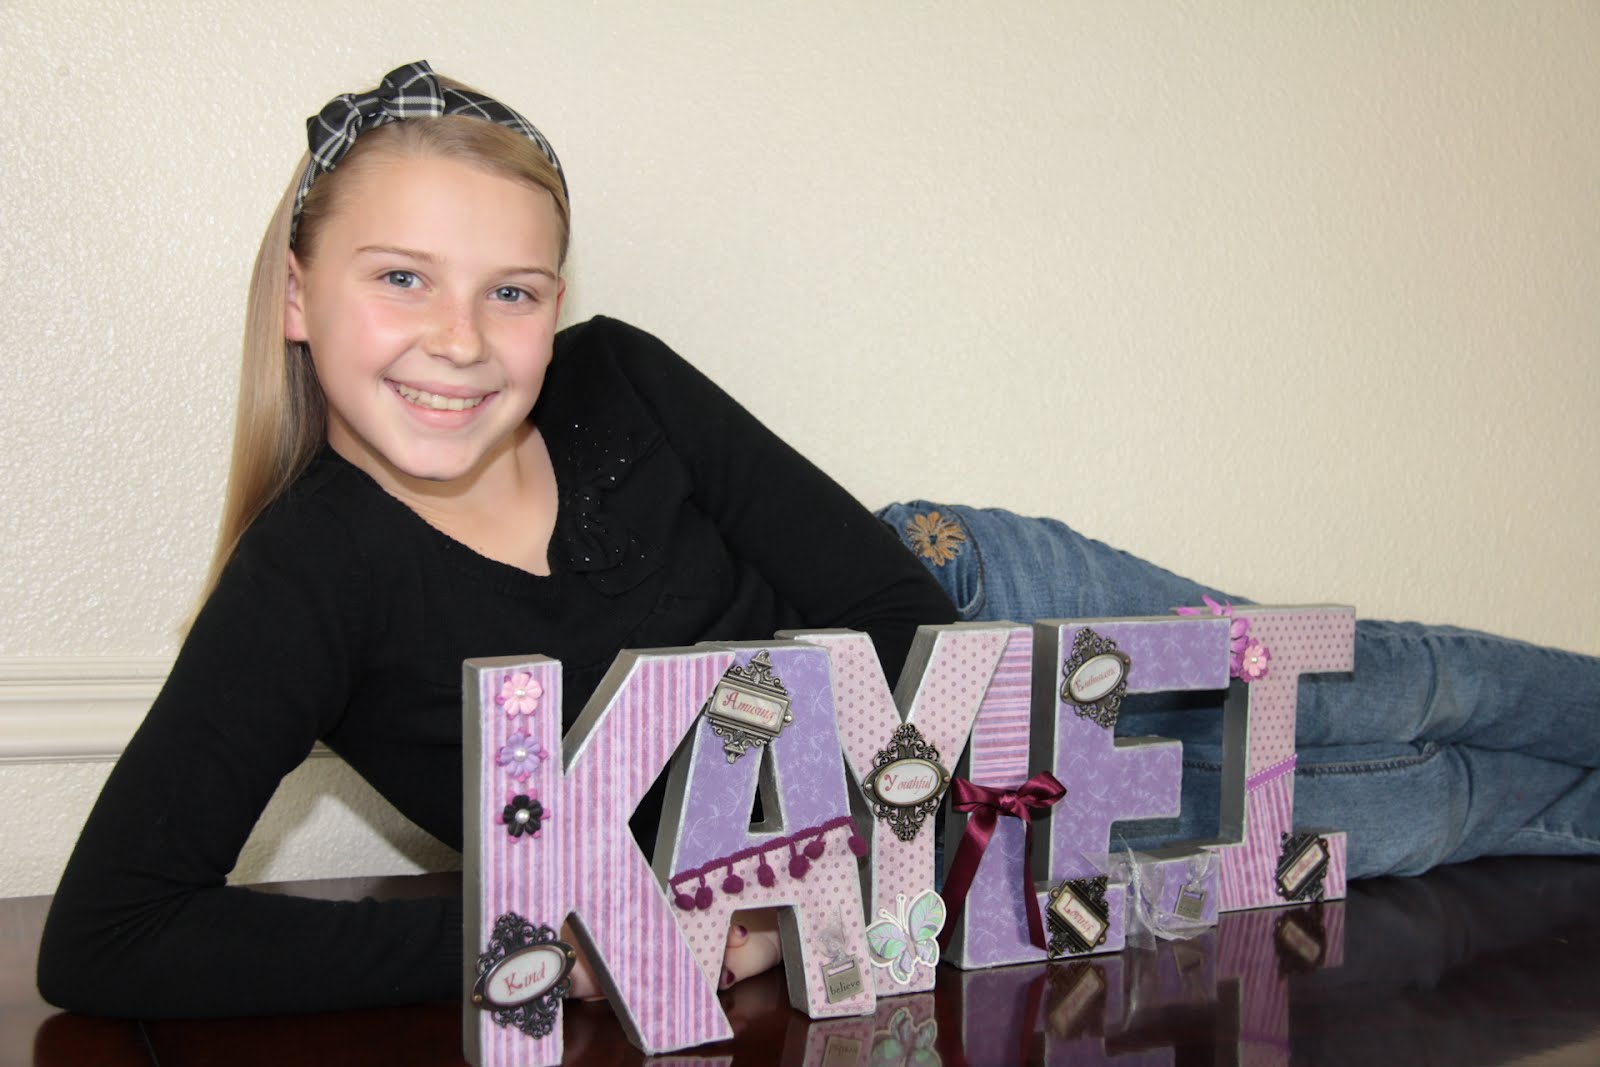
For Christmas we bought our daughter a new bedding set, which I've now realized also means re-decorating her bedroom. My first DIY project is the letters of her name "K-A-Y-L-E-I".
My Supplies:
Joann Fabric and Craft Stores
~8'' Paper Mache Letters - $2.99 each, I got them on sale for $1.99 each.
~Martha Stewart Metallic Acrylic Craft Paint (Color: Sterling) - $1.99
~ 3 pieces of 12x12 scrapbook paper in 3 prints (9 pieces total) - .59
Michael's
~Purple and Gray Ribbon - $2.99, buy one get one half off
~Decorative Purple Ribbon Strand - $1.99
Walmart
~Elmer's Tape Runner - $5.00 (or somewhere around there)
My Scrapbook Room
~Decorative Metal Slides (sorry, can't remember the actual name, another thing that's been antiquing in my drawers)
~Butterfly Stickers
~Vellum paper
~Paper Flowers
~Pearl Stickers
I apologize for not taking step by step pictures...I'm new to this whole blogging thing. I promise more pics next time.
Before I began my project I asked my husband to write down a word that described her for each letter in her name. I did the same thing and then chose 3 of his words and 3 of mine. The words I will use in step 4.
Step 1:
Flip each letter over so that it's backwards and place the printed scrapbook paper print side down. Trace each letter and then cut them out. I chose to do some letters twice on different papers so that I could use more than one paper on each letter.
Step 2:
Paint letters with Metallic Acrylic Craft Paint. I made sure to paint the top edges of the letter slightly just in case the paper didn't completely cover the whole letter. I painted each letter twice, the second coat just seemed to make the silver color "pop".
Step 3:
Once the letters are dried use your tape runner on the letters you cut out and adhere them to each of the paper mache letters.
Step 4:
Take the words that you came up with and print them on your vellum paper. For our daughter we came up with K-Kind, A-Amusing Y-Youthful L-Loving E-Enthusiastic I-Intelligent. Cut each word out and adhere them inside the metal slides.
Step 5:
Decorate your letters with ribbon, metal slides, paper flowers, pearl stickers and butterfly stickers.